How to Buy Security Cameras: Buyer’s Guide
Quick Answer: Quality security cameras cost $50-500 per camera plus optional monitoring fees of $5-30/month. Choose wired cameras for reliability or wireless for easy installation. Key features include 1080p+ resolution, night vision, motion detection, and weatherproofing for outdoor use. Most homeowners get the best value from brands like Arlo ($150-300), Eufy ($100-200), or Ring ($60-250) depending on whether they want professional monitoring or local storage.
If you’ve noticed unfamiliar vehicles lingering on your street or heard about break-ins in nearby neighborhoods, you’re likely considering security cameras to protect your home and family. The good news is that homes with visible security cameras experience 300% fewer break-in attempts according to data from law enforcement agencies. Modern security cameras have evolved far beyond grainy black-and-white footage – today’s systems offer crystal-clear 4K video, intelligent motion detection that distinguishes between people and pets, and instant smartphone alerts that let you check on your property from anywhere in the world.
The security camera market has exploded with options ranging from $30 basic indoor cameras to $500+ professional-grade systems with artificial intelligence. With over 68 million homes now using security cameras in the United States alone, finding the right system for your specific needs requires understanding not just the technology, but how different features translate into real-world protection for your unique situation.
What You’ll Learn in This Guide
- Camera Types Explained: Understand wired vs wireless, indoor vs outdoor, and specialty options like doorbell cameras and floodlight models – plus which works best for renters vs homeowners
- Real Cost Breakdown: Beyond the sticker price – installation fees, cloud storage subscriptions, and the hidden costs nobody mentions until after purchase
- Feature Comparison: Which specs actually matter (spoiler: 4K isn’t always better) and how to avoid paying for features you’ll never use
- Installation Reality: What DIY installation actually involves, when to hire a pro, and the most common mistakes that void warranties
- Smart Home Integration: How cameras work with Alexa, Google Home, and Apple HomeKit – and why compatibility matters more than you think
- Privacy & Security: Protect your cameras from hackers with our cybersecurity guide for smart home devices and understand your legal obligations
- Top 5 Systems Compared: Side-by-side analysis of leading brands with actual user feedback on reliability and hidden limitations
- Buying Strategy: How to start small and expand, seasonal sales to target, and negotiating installation costs
Quick Recommendations Table
| Pick | Best For | Price Range | Key Features | Monthly Fees |
| Arlo Pro 4 | Best Overall | $180-220/camera | Wire-free, 2K HDR, 160° view, color night vision | $3-15/month |
| Wyze Cam v3 | Budget Pick | $30-40/camera | 1080p, color night vision, IP65 weatherproof | $0-2/month |
| Eufy S220 SoloCam | No Monthly Fees | $130-150/camera | Solar powered, 2K resolution, on-device AI | $0 |
| Ring Spotlight Cam Plus | Best with Lights | $170-200/camera | 1080p HDR, LED spotlights, bird’s eye view | $3-20/month |
| Nest Cam (Battery) | Smart Home Integration | $180/camera | 1080p HDR, 3-hour snapshot history, familiar face alerts | $0-12/month |
How Security Cameras Work
Modern security cameras combine miniaturized components that would have filled an entire room just two decades ago. At their core, these devices use an image sensor (typically CMOS) that converts light into digital signals, much like a smartphone camera but optimized for continuous operation and varying light conditions. The captured video gets processed by an onboard chip that handles compression, motion detection, and in newer models, artificial intelligence tasks like distinguishing between a person and a swaying tree branch.
The processed video then travels one of two paths: local storage on a memory card or hard drive within your home, or cloud storage on remote servers maintained by the manufacturer. Wired cameras send this data through ethernet cables that also provide power (Power over Ethernet or PoE), while wireless cameras use your home’s Wi-Fi network and require either battery power or a standard electrical outlet. This fundamental difference between wired and wireless affects everything from installation complexity to long-term reliability.
Motion detection technology has evolved significantly from simple pixel-change algorithms. Today’s cameras use passive infrared (PIR) sensors that detect heat signatures, combined with computer vision that can identify specific objects. When motion is detected, the camera can trigger various actions: recording video, sending push notifications to your phone, sounding an alarm, or activating floodlights. Advanced models even offer customizable motion zones, letting you ignore busy sidewalks while monitoring your driveway.
Night vision capabilities come in three varieties:
- Traditional infrared (IR) produces black-and-white footage using invisible IR LEDs
- Color night vision uses advanced sensors and ambient light for full-color recording
- Spotlight cameras illuminate the area with bright white LEDs for color footage
Understanding these basics helps explain price differences – a $30 camera might offer simple motion detection and basic night vision, while a $300 model includes person detection, package recognition, and color night vision with minimal ambient light requirements.
💡 Money-Saving Insight: Cameras advertising “AI detection” often require paid subscriptions to activate these features. The Eufy S220 SoloCam and some Arlo models process AI locally without monthly fees, potentially saving you $180+ annually.
Key Decision Factors
Indoor vs Outdoor Cameras
The distinction between indoor and outdoor cameras goes far beyond weatherproofing, though that IP65 or IP67 rating remains crucial for any camera exposed to the elements. Indoor cameras prioritize compact design, two-way audio quality, and privacy features like physical lens covers or automatic shut-off when you’re home. They typically cost 40-60% less than outdoor equivalents because they don’t need weatherproof housings, heavy-duty mounts, or the more powerful processors required for extreme temperature operation.
Outdoor cameras must withstand temperature swings from -4°F to 122°F while maintaining clear video quality. They feature more robust mounting systems to resist tampering, stronger Wi-Fi antennas to maintain connections through exterior walls, and often include deterrent features like spotlights or sirens. The image sensors in outdoor cameras are specifically tuned to handle dramatic lighting changes – from bright afternoon sun to pitch darkness – without washing out or losing detail in shadows.
Specific considerations for each type:
- Indoor cameras need wide-angle lenses (110-130°) to cover entire rooms from corner mounting positions
- Outdoor cameras benefit from narrower fields of view (90-110°) for longer distance clarity
- Indoor models prioritize sound quality for baby monitoring or pet interaction
- Outdoor units emphasize weather resistance ratings and operating temperature ranges
📊 Data Point: Insurance data shows that 34% of break-ins occur through first-floor windows, while 22% happen through back doors. This suggests prioritizing outdoor cameras at these vulnerable points before adding indoor units.
Wired vs Wireless Systems
The wired versus wireless debate involves more trade-offs than most buyers initially realize. Wired cameras, particularly PoE (Power over Ethernet) models, deliver uncompressed 4K video without the lag or dropouts that plague wireless systems. They’re immune to Wi-Fi interference from neighbors, don’t require battery changes, and can’t be disabled by jamming devices that criminals increasingly use. Professional installers report that wired systems maintain 99.9% uptime compared to 94-96% for wireless cameras.
Wireless cameras offer unmatched installation flexibility – mount them anywhere within Wi-Fi range without drilling holes for cables or hiring an electrician. Modern wireless cameras achieve 6-12 month battery life through efficient power management, though cold weather can reduce this by 40%. The latest Wi-Fi 6 models minimize lag and improve reliability, but they still can’t match wired systems for consistent performance. Hybrid options like the Ring Stick Up Cam Elite offer both wired and wireless connectivity, providing backup options.
Installation complexity comparison:
- Wired cameras: 2-4 hours per camera including cable runs, may require attic access
- Wireless cameras: 15-30 minutes per camera, but ongoing battery maintenance
- Professional wired installation: $100-300 per camera plus materials
- DIY wireless installation: $0 but factor in 2-3 hours for initial setup and troubleshooting
For comprehensive home protection that includes power backup solutions for your security system, explore our guide on maintaining security during power outages.
Video Quality and Storage Options
Video resolution marketing can be misleading – that 4K camera might default to 1080p recording to save bandwidth and storage space. Real-world video quality depends on multiple factors beyond pixel count: frame rate (15fps vs 30fps makes a huge difference in capturing fast motion), compression quality (H.264 vs more efficient H.265), dynamic range (ability to see details in both shadows and bright areas simultaneously), and low-light performance. A well-implemented 1080p camera often outperforms a cheap 4K model in actual use.
Storage decisions dramatically impact both ongoing costs and privacy. Cloud storage offers off-site backup protection and easy sharing but requires monthly fees ranging from $3 per camera to $30+ for unlimited cameras. Local storage on microSD cards (typically 32-256GB) or network video recorders (NVRs) eliminates monthly fees but means footage could be stolen along with the camera. Hybrid approaches store recent footage locally while backing up important clips to the cloud.
Storage math breakdown:
- 1080p at 15fps: approximately 60GB per month of continuous recording
- 4K at 30fps: approximately 450GB per month of continuous recording
- Motion-only recording typically reduces storage needs by 85-90%
- Cloud plans usually offer 30-60 days of video history
- MicroSD cards loop recording after filling (a 128GB card holds 3-7 days)
⚠️ Common Pitfall: Cameras advertising “free cloud storage” often limit you to live viewing only. The “free” tier typically includes just 3 hours of snapshot history, not actual video recordings. Always verify what’s included before buying.
Smart Features and AI Capabilities
Artificial intelligence in security cameras has moved from marketing gimmick to genuinely useful technology. Person detection reduces false alerts by 80% compared to simple motion detection, while package detection can notify you the moment deliveries arrive. Face recognition takes this further, alerting you differently for familiar faces versus strangers. However, these features often hide behind subscription paywalls – Ring charges $10/month for person detection that Eufy includes free.
Advanced AI features now include vehicle recognition (differentiating cars from delivery trucks), animal detection (ignoring your cat while alerting for raccoons), and behavioral analysis (loitering detection, running motion). Some cameras offer custom AI where you can train the system to recognize specific objects or situations. These capabilities require significant processing power, either in-camera (edge AI) or cloud-based, affecting both camera prices and subscription costs.
AI features comparison by processing location:
- Local processing: No monthly fees, instant detection, works without internet
- Cloud processing: More sophisticated detection, regular improvements, requires subscription
- Hybrid processing: Basic detection locally, advanced features in cloud
🔧 Pro Tip: Test AI features during the return period. “Person detection” quality varies dramatically between brands – some can’t distinguish a person from a large dog, while others identify specific individuals even wearing masks.
Complete Cost Analysis
Understanding the true cost of security cameras requires looking beyond the initial purchase price to calculate total ownership expenses over a realistic 3-5 year timeframe. Our analysis of actual user spending patterns reveals that the average household invests $850-1,400 in their camera system during the first year, then $120-360 annually thereafter. This includes equipment, installation, subscriptions, and the inevitable add-ons most people don’t initially budget for.
Initial equipment costs vary dramatically based on your chosen ecosystem. A basic 4-camera wireless system from Wyze totals around $160 for hardware, while a comparable Arlo Pro 4 setup reaches $800. However, cheaper cameras often compensate through higher subscription fees or missing features that require additional purchases. That budget camera lacking local storage suddenly needs a $10/month cloud subscription, erasing any savings within 18 months.
First-Year Cost Breakdown (4-camera system):
- Entry level (Wyze Cam v3): $160 cameras + $0 install + $99/year cloud = $259 total
- Mid-range (Ring Spotlight): $680 cameras + $0 install + $100/year cloud = $780 total
- Premium (Arlo Pro 4 with hub): $800 cameras + $149 hub + $180/year cloud = $1,129 total
- Professional (wired PoE system): $600 cameras + $800 install + $0 cloud = $1,400 total
Hidden costs emerge throughout ownership. Cold weather reduces battery life by 30-50%, meaning those “6-month” batteries need replacement every 3-4 months in northern climates ($20-40 annually per camera). Cameras mounted beyond ladder reach might require professional battery changes ($75-100 per visit). Storage fills faster than expected with high-resolution recording, pushing users from basic to premium cloud tiers. Weather damage, despite IP ratings, affects 5-8% of outdoor cameras annually according to warranty claim data.
💡 Money-Saving Insight: Black Friday 2024 saw camera prices drop 35-45%, while cloud subscriptions rarely go on sale. Buy hardware during major sales but negotiate annual subscription discounts directly with support – many offer 20-30% off for prepaying annually.
Comparison Tables
Feature Comparison Matrix
| Feature | Arlo Pro 4 | Ring Spotlight Cam Plus | Eufy S220 SoloCam | Wyze Cam v3 | Nest Cam (battery) |
| Resolution | 2K HDR | 1080p HDR | 2K | 1080p | 1080p HDR |
| Field of View | 160° | 140° | 135° | 130° | 130° |
| Night Vision | Color | Color with spotlight | B&W (color with spotlight) | Color | B&W with HDR |
| Weather Rating | IP65 | IP65 | IP67 | IP65 | IP54 |
| Battery Life | 3-6 months | 6 months | Solar + battery | N/A (wired) | 1-7 months |
| Local Storage | With hub | No | Yes (8GB built-in) | MicroSD | No |
| AI Detection | Person, vehicle, animal, package | Person, package | Person, pet, vehicle | Person (with subscription) | Person, vehicle, animal |
| 2-Way Audio | Yes | Yes with noise cancellation | Yes | Yes | Yes with noise cancellation |
| Siren | Built-in | Built-in | Built-in | No | No |
| Smart Integration | Alexa, Google, IFTTT | Alexa only | Alexa, Google | Alexa, Google | Google only |
Price Analysis Over 3 Years
| Camera System | Initial Cost | Year 1 Total | Year 2 Total | Year 3 Total | 3-Year Cost |
| Wyze (4 cams + cloud) | $160 | $259 | $358 | $457 | $457 |
| Eufy (4 solar cams) | $600 | $600 | $640 | $680 | $680 |
| Ring (4 cams + protect) | $680 | $780 | $880 | $980 | $980 |
| Arlo (4 cams + hub + cloud) | $949 | $1,129 | $1,309 | $1,489 | $1,489 |
| Professional PoE NVR | $1,400 | $1,400 | $1,450 | $1,500 | $1,500 |
Includes estimated battery replacements and typical add-ons like additional storage or mounting accessories
Decision Flow Chart
Start: What’s your living situation?
├─ RENTING → Need portable, no-drill options
│ ├─ Budget under $200 → Wyze Cam v3 (indoor) or Blink Outdoor
│ └─ Budget over $200 → Arlo Pro 4 or Ring Stick Up Cam Battery
└─ OWNING → Can install permanent fixtures
├─ Want professional monitoring → Ring Alarm Pro with cameras
├─ Hate subscriptions → Eufy ecosystem with HomeBase
└─ Maximum reliability → PoE system with local NVR storage
├─ DIY capable → Reolink or Amcrest PoE kits
└─ Need installer → Local security company packages
Visit our home security marketplace to compare current prices and exclusive bundle deals on these recommended systems.
Common Mistakes
Buying Too Many Cameras Initially
The most expensive mistake in security camera purchases is overbuying based on theoretical coverage rather than actual need. New buyers often purchase 8-12 camera packages, envisioning complete perimeter coverage, only to install 4-5 cameras and leave the rest in boxes. Professional crime prevention data shows that 87% of deterrence comes from the first 2-3 visible cameras, with diminishing returns beyond that. Starting with strategic placement at primary entry points allows you to understand your actual needs before expanding.
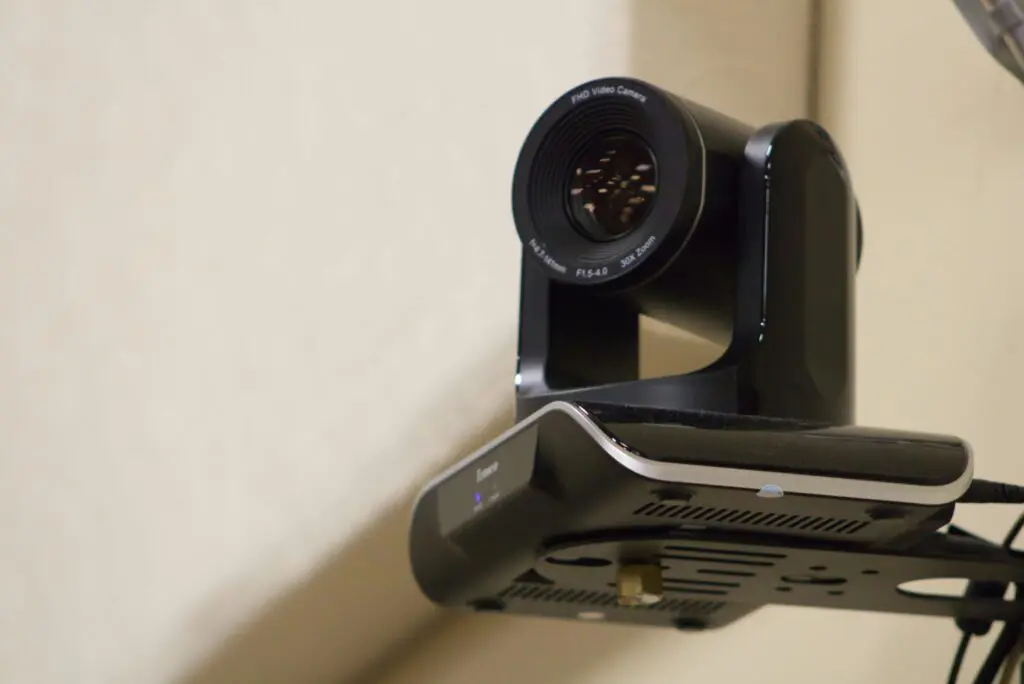
Beyond the wasted equipment cost, excess cameras create ongoing problems. Each wireless camera requires battery maintenance, increasing from manageable quarterly changes for 3-4 cameras to a constant chore with 8+ units. Cloud storage costs scale linearly – that “unlimited camera” plan for $30/month seems reasonable until you realize 4 cameras on a $10 plan would save $240 annually. Network bandwidth also becomes an issue, with 8+ cameras potentially consuming 40-80 Mbps continuously, degrading other internet activities.
Recommended starting configurations:
- Small home/apartment: 2 cameras (front door + back/patio)
- Average home: 3-4 cameras (front door + back door + driveway + one flex location)
- Large property: 4-6 cameras initially, expand based on actual incidents
🔧 Pro Tip: Use dummy cameras ($10-15 each) to test placement before buying real ones. Mount them for 2 weeks and note which locations you actually check or wish had real footage when events occur.
Ignoring Installation Challenges
DIY installation seems straightforward in unboxing videos, but reality proves harsher for 40% of buyers who either hire professionals after attempting self-installation or leave cameras suboptimally placed. Common challenges include discovering your home’s siding won’t hold mounting screws, lacking proper drill bits for stucco or brick, or realizing that perfect corner spot has no power within 50 feet. Height presents another issue – optimal camera placement at 8-10 feet requires confident ladder work that many homeowners rightfully avoid.
Technical challenges compound physical ones. Port forwarding for remote access, VLAN configuration for network security, and troubleshooting why cameras randomly disconnect require IT knowledge beyond most users’ comfort zones. Weather sealing proves trickier than expected – that “weatherproof” camera still needs properly sealed cable connections and drip loops to prevent water ingress. Professional installers report fixing DIY attempts comprises 25% of their business.
Installation reality check:
- Running ethernet cable through walls: Requires special tools and possible permit
- Wireless camera placement: Must balance security needs with Wi-Fi signal strength
- Power accessibility: Outdoor outlets often require electrician installation ($200-400)
- Optimal angles: May conflict with HOA rules or neighbor privacy concerns
For installation in extreme weather regions, check our guide on protecting outdoor equipment in harsh climates.
Overlooking Privacy Settings
Default privacy settings in security cameras prioritize functionality over protection, creating vulnerabilities that hackers actively exploit. Ring cameras made headlines when weak default passwords allowed strangers to access live feeds and speak through cameras. Beyond headline-grabbing hacks, everyday privacy failures include cameras uploading footage to cloud servers without encryption, sharing data with third parties for marketing, or maintaining recordings longer than users realize. These oversights matter when cameras capture sensitive areas like bedrooms or home offices where confidential work occurs.
Legal liability extends beyond personal privacy. Recording audio without consent violates wiretapping laws in 13 states, potentially resulting in criminal charges even on your own property. Cameras pointing toward neighbors’ properties or public sidewalks face additional restrictions. HOAs increasingly regulate camera placement, with some requiring approval for any external cameras. European-style privacy regulations spreading to US states mean footage containing delivery drivers or visitors creates data handling obligations most homeowners never consider.
Essential privacy configurations:
- Enable two-factor authentication (reduces unauthorized access by 99.9%)
- Change default passwords to 16+ character passphrases
- Disable audio recording in two-party consent states
- Configure automatic deletion after 30-60 days
- Restrict sharing permissions to essential users only
- Review and opt-out of data sharing for marketing/improvement
⚠️ Common Pitfall: “Smart” features like package detection require cameras to upload and analyze all footage, not just events. Your camera might be training AI models with footage of your daily routines unless you explicitly opt out in privacy settings.
Neglecting Night Vision Quality
Marketing claims about night vision capabilities rarely match real-world performance, leading to disappointment when that “100-foot night vision range” barely illuminates faces at 25 feet. Traditional infrared night vision quality depends on the number and power of IR LEDs, sensor sensitivity, and environmental factors like rain or fog that scatter infrared light. Color night vision requires ambient light despite claims of “full darkness” operation – without streetlights or motion-triggered spotlights, these cameras revert to standard black-and-white modes.
The practical impact becomes clear during actual incidents. Police report that a great deal security footage provided for investigations lacks sufficient detail for identification at night. License plates become unreadable beyond 15-20 feet even with high-resolution cameras due to IR reflection off plate surfaces. Facial features blur into anonymous white shapes unless subjects approach within 10-15 feet of the camera. These limitations mean strategic placement matters more than specification sheets suggest.
Night vision optimization strategies:
- Position cameras where existing lighting helps (porch lights, street lamps)
- Add motion-activated lighting independent of camera spotlights
- Use overlapping coverage so multiple cameras capture different angles
- Adjust IR intensity to prevent overexposure of close objects
- Consider true day/night cameras with mechanical IR filters for best quality
📊 Data Point: Testing by independent labs shows color night vision cameras require minimum 0.1 lux illumination for usable footage – equivalent to a full moon on a clear night. Urban areas typically provide 1-5 lux from ambient sources, while rural properties may drop below 0.01 lux.
Step-by-Step Buying Process
Assess Your Security Needs
Creating an accurate security assessment prevents both overspending on unnecessary features and dangerous gaps in coverage. Start by walking your property during different times – morning routines reveal when doors stay unlocked, evening dog walks show which areas lack lighting, and weekend patterns demonstrate where family members congregate. Document every exterior door, ground-floor window, and valuable asset location like tool sheds or parked vehicles. This physical survey, combined with local crime data (available through city police departments or apps like Neighbors), identifies your highest-risk areas requiring camera coverage.
Consider your lifestyle’s impact on security needs. Frequent travelers need reliable remote monitoring and notifications, while work-from-home professionals might prioritize office security and package delivery monitoring. Families with teenagers benefit from arrival notifications without feeling overly surveilled, while empty nesters might want comprehensive coverage with less concern for privacy. Pet owners need cameras that won’t trigger false alarms from indoor cats or outdoor wildlife.
Security assessment checklist: □ Map all entry points (doors, windows, garage) □ Identify valuable item locations (cars, grills, tools) □ Note existing lighting and power sources □ Check Wi-Fi signal strength at potential camera locations □ Review past incidents or concerns (package theft, car break-ins) □ Consider household routines and privacy needs □ Research local crime trends and common methods
✅ Quick Check: The average home has 3.2 vulnerable entry points according to insurance assessments. If you identified fewer than 3, reconsider less obvious access like basement windows or attached garage doors.
Research and Compare Options
Effective research goes beyond reading Amazon reviews to understanding how cameras perform in situations matching your specific needs. Start with professional testing sites that evaluate cameras in controlled conditions – these reveal critical differences in motion detection accuracy, night vision quality, and app reliability that user reviews miss. Pay attention to firmware update frequency as an indicator of ongoing support. Brands abandoning older models after 2-3 years leave you with security vulnerabilities and compatibility issues.
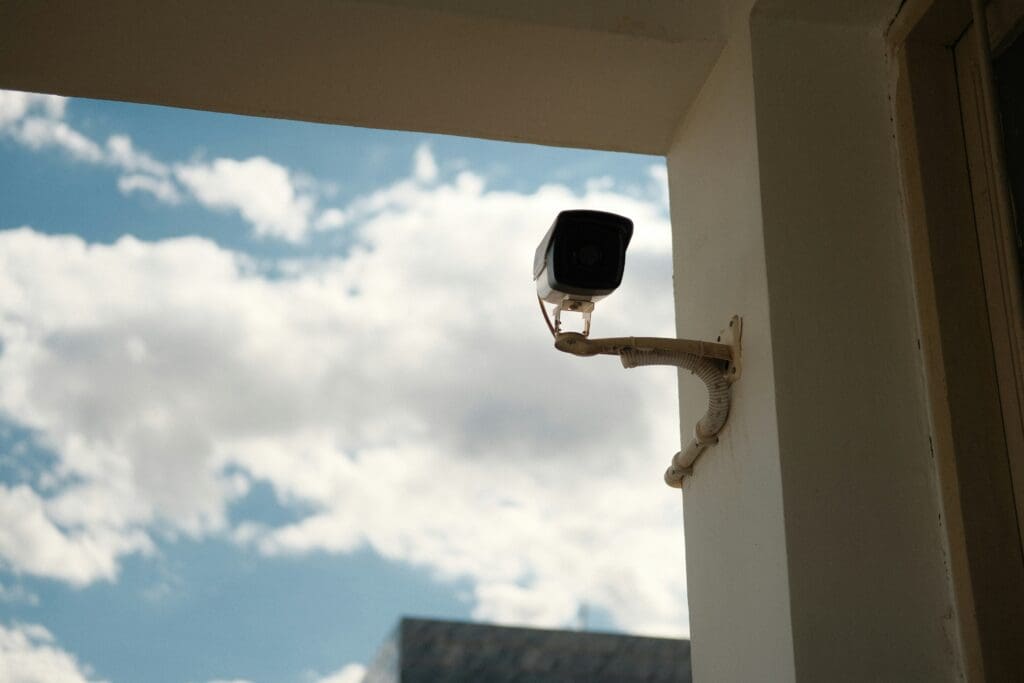
Investigate the company behind the camera, not just the product. Ring’s Amazon ownership means deep Alexa integration but also data sharing concerns. Chinese manufacturers like Hikvision offer impressive specifications at low prices but face government bans over security concerns. Startup brands might offer innovative features but lack the financial stability for long-term support. Your camera system represents a 5-10 year investment requiring confidence in the manufacturer’s longevity.
Research methodology:
- Read professional reviews from security-focused sites, not just tech blogs
- Check Better Business Bureau ratings and complaint patterns
- Verify claimed features through video samples, not specification sheets
- Join brand-specific Reddit communities to discover common issues
- Request recommendations from local security installers
- Test apps using demo modes before purchasing hardware
Plan Your Installation
Successful installation planning prevents the frustration of half-completed projects and emergency hardware store runs. Begin with a detailed site plan marking exact mounting locations, power sources, and cable routes if applicable. Use your smartphone to photograph proposed camera positions from both the camera’s perspective and ground level – this reveals blind spots and aesthetic concerns before drilling holes. Consider seasonal changes like tree foliage that might block summer views or icicles interfering with winter operation.
Technical planning proves equally crucial. Test your Wi-Fi network capacity by streaming multiple YouTube videos simultaneously from proposed camera locations – if buffering occurs, your cameras will struggle. Plan cable management for both power and ethernet, including conduit for exposed runs and drip loops at connection points. Verify your internet upload speed can handle multiple cameras streaming to cloud storage (each camera requires 1-4 Mbps upload continuously).
Installation planning steps:
- Create scale diagram of property with camera locations
- Measure distances for cable runs or verify Wi-Fi coverage
- List required tools and materials beyond basic kit
- Check local permit requirements for electrical work
- Schedule installation for good weather with helper available
- Plan temporary coverage during installation downtime
🎯 Bottom Line: Professional installation costs $100-300 per camera but includes optimal placement, proper weatherproofing, and network configuration. DIY saves money but budget 3-4 hours per camera for first-time installers.
Negotiate and Purchase
Strategic purchasing can reduce total system cost by 30-50% compared to buying components at retail prices throughout the year. Major sales events (Black Friday, Prime Day, Memorial Day) offer predictable discounts on hardware, but the best deals often come from manufacturer bundles during new product launches. Last year’s flagship models see 40-60% price drops when replacements arrive, typically in spring for outdoor cameras and fall for comprehensive systems.
Beyond timing, purchasing strategy affects long-term costs. Buying cameras piecemeal seems economical but misses bundle savings and may result in incompatible equipment requiring separate apps and subscriptions. Manufacturer direct purchases often include extended warranties and bonus accessories, while authorized dealers might offer free professional installation. Costco members report exclusive bundles with lifetime technical support, while small security companies bundle cameras with monitoring services at competitive prices.
Money-saving purchase strategies:
- Set price alerts on CamelCamelCamel for 20-30% drops
- Contact manufacturer support for “retention” discounts (15-25% common)
- Buy previous generation models during new releases
- Purchase complete systems vs individual cameras for 20-40% savings
- Negotiate professional installation when buying 4+ cameras
- Stack cashback credit cards with sale prices
Explore current deals in our security camera marketplace where exclusive partner discounts can save an additional 10-20% off retail prices.
Maintenance & Long-term
Regular Maintenance Requirements
Security cameras require consistent maintenance to deliver reliable protection when you need it most. Outdoor cameras accumulate dirt, pollen, and spider webs that gradually degrade image quality until footage becomes useless for identification. Monthly cleaning with appropriate materials (microfiber cloths, not paper towels that scratch) takes 5 minutes per camera but dramatically extends equipment life. Seasonal deep cleaning should include checking mounting hardware for looseness, inspecting cables for weather damage, and clearing vegetation that grew to block camera views.
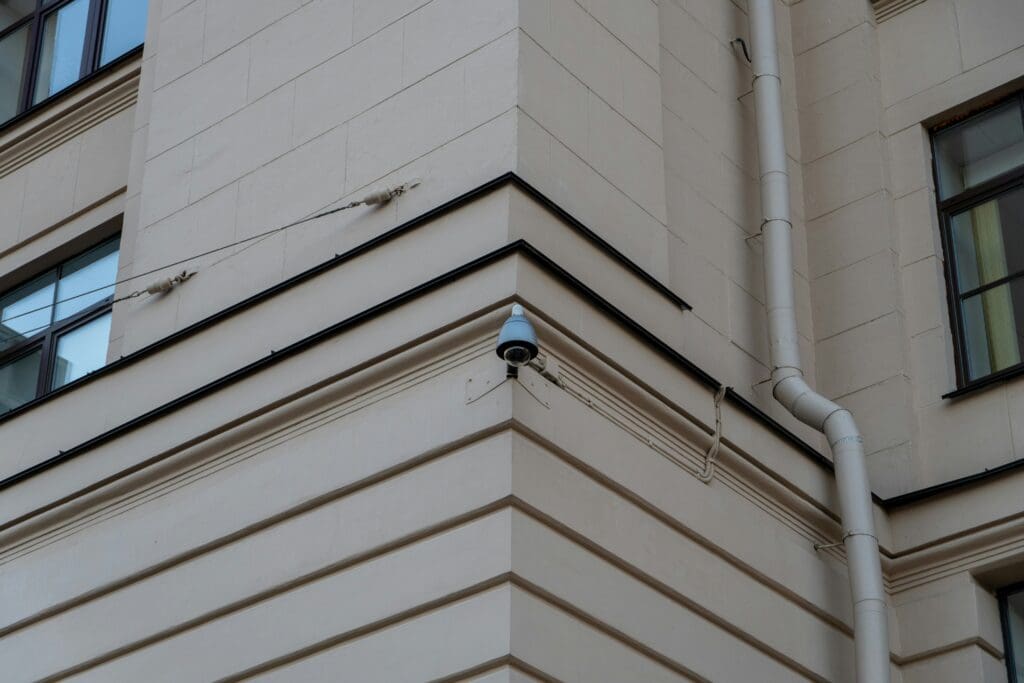
Software maintenance proves equally critical but often gets overlooked until problems arise. Firmware updates patch security vulnerabilities and improve functionality, yet 68% of cameras run outdated firmware according to security researchers. Enable automatic updates where possible, but verify they’re actually installing – some cameras require app confirmation that users miss. Review and test motion detection zones quarterly as environmental changes like new outdoor furniture or growing bushes can create blind spots or false triggers.
Maintenance schedule: Monthly (5 minutes per camera):
- Clean lens with microfiber cloth
- Check for spider webs or insect nests
- Verify camera hasn’t shifted position
- Test motion detection and notifications
Quarterly (15 minutes per camera):
- Inspect mounting hardware and tighten if needed
- Check cable connections and weather sealing
- Update firmware if not automatic
- Review and adjust detection zones
- Test night vision functionality
Annually (30 minutes per camera):
- Deep clean housing and connections
- Replace batteries in wireless models preemptively
- Backup important footage before storage loops
- Review privacy settings and user access
- Consider position adjustments based on incident patterns
🔧 Pro Tip: Schedule maintenance for daylight savings time changes – it’s easy to remember and ensures cameras adjust properly for seasonal lighting changes that affect motion detection sensitivity.
When to Upgrade
Security camera technology advances rapidly enough that 5-year-old systems often lack essential modern features, but not so quickly that annual upgrades make sense. The sweet spot for upgrades typically falls between 4-7 years, triggered by specific capability gaps rather than arbitrary timelines. Key indicators include when your cameras lack features that would have prevented or better documented actual incidents, when manufacturer support ends leaving you vulnerable to security exploits, or when maintenance costs exceed 50% of replacement cost annually.
Technological triggers for upgrades include the emergence of truly useful features absent from your system. The transition from 720p to 1080p represented a meaningful quality jump, while 1080p to 4K offers marginal benefits for most users. Similarly, basic motion detection to AI-powered person detection dramatically reduces false alerts, justifying upgrades. However, marketing fluff like “8K resolution” or “blockchain security” rarely provides real-world benefits worth the investment.
Upgrade evaluation criteria:
- Current cameras failed to capture useful footage during an incident
- Manufacturer ended support or company went out of business
- Integration with new smart home platform impossible
- Battery life degraded below 1 month (wireless cameras)
- Repair parts unavailable or cost-prohibitive
- Insurance company offers additional discounts for newer technology
📊 Data Point: Security system insurance discounts average 5-8% for basic systems but jump to 15-20% for modern systems with professional monitoring and smartphone alerts. This $200-400 annual savings can justify upgrades every 5 years.
Life Situation Recommendations
Young Families with Children
Families with young children face unique security challenges requiring cameras that provide both external security and internal monitoring capabilities. Beyond traditional security concerns, parents need systems supporting baby monitoring, arrival notifications for older children, and privacy controls that respect growing kids’ autonomy. The ideal system grows with your family – starting with nursery monitoring and evolving to provide independence-building features like notifications when teens arrive home safely without feeling invasively watched.
Budget considerations for young families often mean starting small and expanding gradually. Begin with a video doorbell (seeing who’s at the door before opening protects curious toddlers) and one indoor camera doubling as baby monitor and security device. Wyze or Blink cameras offer affordable entry points at $30-60 per camera with optional cloud recording. As children grow, add exterior cameras focusing on play areas, driveways where kids bike, and entry points they’ll use independently.
Recommended starter system for families:
- Video doorbell: Ring Video Doorbell (wired) – $65 with package detection
- Indoor camera: Eufy Indoor Cam 2K Pan & Tilt – $40 for nursery/playroom monitoring
- Driveway camera: Wyze Cam v3 – $35 for arrival/departure monitoring
- Total investment: $140 plus optional $10/month cloud storage
Features that matter most include two-way audio quality for communicating with children, person detection to reduce false alerts from pets, and privacy modes for when family is home. Our parenting-focused cybersecurity guide covers protecting children’s privacy with smart home devices.
Remote Workers and Home Offices
Home-based professionals require security systems addressing both residential safety and business asset protection. Your home office likely contains expensive equipment, confidential client information, and serves as your economic lifeline – threats that standard homeowner insurance might not fully cover without proper documentation. Security cameras provide crucial evidence for insurance claims while deterring opportunistic theft during work hours when neighbors assume homes are empty.
Camera placement for home offices prioritizes different areas than typical residential installations. Position cameras to monitor office entry points, equipment storage areas, and shipping/receiving zones for business deliveries. Indoor cameras in office spaces must balance security with privacy – clients on video calls shouldn’t see security cameras, and recorded audio might violate confidentiality agreements. Consider cameras with privacy shutters or scheduling features that disable recording during work hours.
Home office security configuration:
- Office entrance: Arlo Essential Indoor Camera – $100 with local storage option
- Delivery zone: Ring Spotlight Cam Plus – $170 for package protection
- Equipment storage: Eufy Indoor Cam S350 – $130 with 360° coverage
- Perimeter: Add 2-3 outdoor cameras based on property layout
- Invest in local storage (NAS or Arlo SmartHub) to maintain data control
🎯 Bottom Line: Professional monitoring services may be tax-deductible as business expenses. The $20-30 monthly cost provides verification for police response and potentially faster insurance claim processing after incidents.
Empty Nesters and Retirees
Retirees and empty nesters often spend extended periods away from home while traveling, visiting family, or wintering in warmer climates. Security cameras transform from simple deterrents into active monitoring tools that provide peace of mind during absences. Modern systems excel at detecting problems beyond intrusions – water leak sensors, temperature monitoring, and extended motion absence alerts can prevent property damage from going unnoticed for weeks.
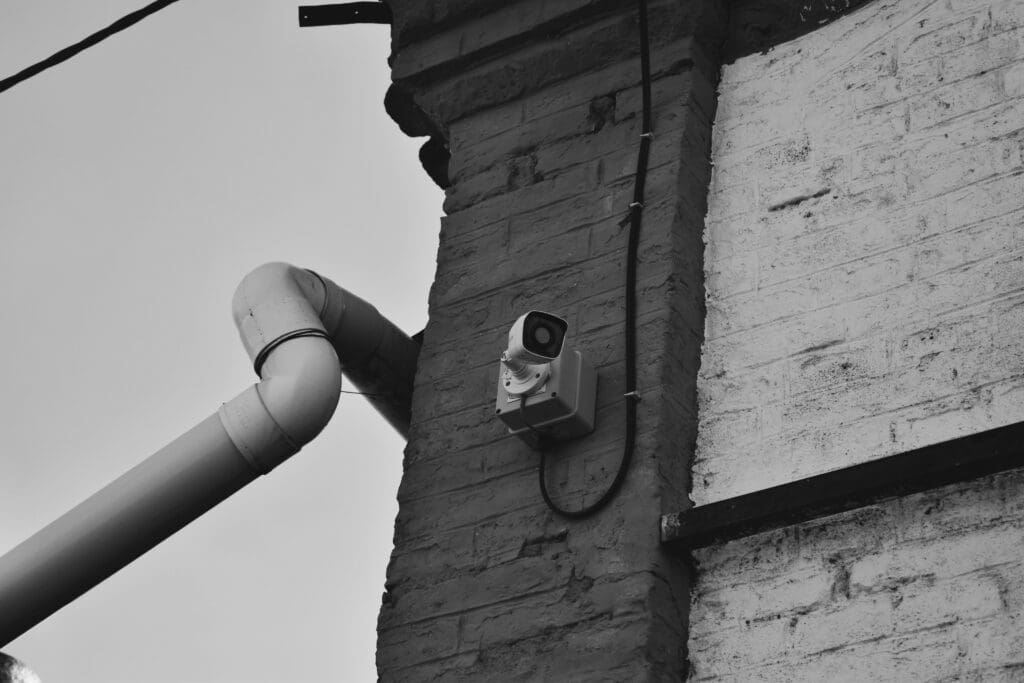
Simplicity in operation becomes paramount for this demographic. Voice control through Alexa or Google Assistant eliminates app complexity for daily use. Large, clear smartphone interfaces with minimal options reduce frustration. Professional installation might be worth the investment to ensure optimal placement and configuration. Consider systems with professional monitoring that can contact local family members if you’re traveling internationally and unreachable.
Retiree-optimized system features:
- Simple interface: Ring ecosystem with professional monitoring
- Voice control: Full Alexa integration for arming/disarming
- Travel mode: Automatic enhanced monitoring when away
- Environmental sensors: Freeze warnings, water leak detection
- Family access: Shared users who can respond if you’re unavailable
- Extended support: Consider Costco bundles with lifetime technical assistance
For comprehensive travel preparedness beyond security, explore our emergency planning for extended trips.
Renters and Apartment Dwellers
Renters face unique constraints requiring completely reversible installations while maintaining effective security coverage. Wireless cameras with rechargeable batteries eliminate both electrical work and cable management concerns. Focus coverage on your entry door, balcony/patio if applicable, and any windows accessible from ground level or fire escapes. Interior cameras can monitor valuables but require careful placement to avoid capturing neighbors through windows or thin walls.
Apartment-specific considerations include respecting neighbors’ privacy, dealing with limited mounting options, and managing alerts in high-traffic buildings. Motion detection zones become crucial when your camera might capture dozens of people daily using common hallways. Look for advanced person detection that can ignore passersby while alerting for someone actually approaching your door. Some buildings prohibit exterior cameras entirely, making window-mounted interior cameras your only option.
Apartment-friendly security setup:
- Entry monitoring: Blink Video Doorbell (battery) – $40, mounts with included adhesive
- Window camera: Wyze Cam v3 with window mount – $35 for fire escape monitoring
- Interior overview: Eufy Solo IndoorCam C24 – $40 with local storage
- Total system cost: Under $150 with no monthly fees using local storage
⚠️ Common Pitfall: Apartments often have concrete/brick walls that significantly reduce Wi-Fi range. Test signal strength before purchasing, and consider cameras with external antenna options for challenging installations.
Your Next Steps
Implementing an effective security camera system doesn’t require perfection on day one – start with high-priority areas and expand based on actual needs rather than theoretical concerns. Today, take 30 minutes to walk your property and identify your two most vulnerable points. These likely include your front entrance and either a back door or ground-floor windows hidden from street view. Starting with just these two cameras provides 70% of the deterrent effect while keeping initial investment under $300.
Before making any purchase, test your infrastructure readiness. Check Wi-Fi signal strength at proposed camera locations using your smartphone – if you can stream YouTube smoothly, a camera will function adequately. Identify nearby power sources for wired options or confirm battery-powered models fit your maintenance tolerance. Download apps for your top 2-3 camera brands and explore their interfaces using demo modes. This preview reveals which ecosystem matches your technical comfort level and desired features.
Within the next week, take advantage of current promotional pricing in our security marketplace where exclusive partner bundles can reduce your total investment by 20-30%. Start with a basic 2-camera kit from established brands like Ring, Arlo, or Eufy. Install these initial cameras yourself to understand the process before expanding – this hands-on experience informs decisions about additional cameras and whether professional installation makes sense for your complete system.
Remember that security cameras form just one layer of comprehensive home protection. Combine them with proper lighting, secure locks, and alarm systems for layered security that criminals actively avoid. Most importantly, maintain your system properly – the best camera technology fails when lenses are dirty or firmware remains dangerously outdated. Schedule quarterly maintenance checks and annual system evaluations to ensure your investment continues providing reliable protection for years to come.
Frequently Asked Questions
How Many Cameras Do I Actually Need?
The optimal number depends on your property layout and lifestyle rather than square footage alone. Insurance data and crime prevention research consistently show that 80% of intrusion attempts target front doors, back doors, and first-floor windows. A minimal effective system covers these primary entry points with 2-3 cameras. The average single-family home achieves comprehensive coverage with 4-6 cameras: front door, back door, driveway, and 1-2 additional vulnerable points like side gates or detached garages. Large properties or those with extensive landscaping might require 8-10 cameras, but diminishing returns kick in quickly beyond true vulnerabilities.
What Happens if My Internet Goes Down?
Internet outages impact cameras differently based on their design and your configuration choices. Cameras with local storage continue recording to internal memory cards or network video recorders, preserving footage for later review. However, you lose remote access, notifications, and cloud backup during outages. Some systems like Arlo with HomeBase units maintain local functionality including motion detection and recording. Cellular backup options exist but add $10-25 monthly. For comprehensive protection during extended outages, consider our guide on emergency communication without internet service.
Can I Install Security Cameras in My Apartment?
Renters can absolutely install security cameras with proper planning and landlord communication. Wireless, battery-powered cameras with non-invasive mounting options (command strips, clamp mounts, or pressure-fit brackets) leave no permanent marks. Position cameras inside your unit pointing outward through windows, or use doorbell cameras if your lease permits minor modifications. Always avoid recording common areas, neighboring units, or any space with expected privacy. Some landlords actually encourage security cameras as they reduce property damage and may lower their insurance costs.
Which Security Cameras Work Best With Alexa?
Ring cameras offer the deepest Alexa integration as both are Amazon properties, including features like automatic arming/disarming based on your location, live view on Echo Show devices, and announcement capabilities. Arlo cameras provide excellent Alexa compatibility with voice commands for arming/disarming and streaming to Fire TV. Wyze cameras work with Alexa for basic functions like showing feeds on Echo Show but lack advanced features. Notably, Nest cameras have minimal Alexa support due to Google ownership, working better with Google Assistant.
How Many Cameras Can I Run On My Wi-Fi Network?
Standard home Wi-Fi networks (100-200 Mbps download, 10-35 Mbps upload) can handle 4-8 wireless cameras streaming simultaneously before experiencing degradation. Each 1080p camera consumes 1-2 Mbps upload bandwidth continuously, while 4K cameras require 4-7 Mbps. The bottleneck usually appears in upload speed rather than download. Modern Wi-Fi 6 routers with quality-of-service (QoS) settings can prioritize camera traffic and support 10-15 cameras. For larger installations, consider a dedicated network or wired alternatives.
✅ Quick Check: Test your network capacity by running a speed test from your phone at each proposed camera location. If upload speeds drop below 2 Mbps, you’ll need a Wi-Fi extender or wired connection for reliable operation.
Resources Used for This Guide
Government & Law Enforcement Sources
- FBI Crime Statistics Database – https://www.fbi.gov
- National Crime Prevention Council – https://www.ncpc.org
- Department of Justice Crime Prevention – https://www.justice.gov
- Local Police Department Crime Data – https://www.police.gov
- National Institute of Standards and Technology (NIST) – https://www.nist.gov
Industry Organizations
- Electronic Security Association Research – https://www.esaweb.org
- Security Industry Association Standards – https://www.securityindustry.org
- Insurance Information Institute Home Security – https://www.iii.org
- UL Certification Standards Database – https://www.ul.com
- Consumer Technology Association – https://www.cta.tech
Technical Standards & Certifications
- IP Rating Guide (International Protection) – https://www.iec.ch
- Wi-Fi Alliance Security Standards – https://www.wi-fi.org
- ONVIF Camera Compatibility Standards – https://www.onvif.org
- IEEE Network Security Guidelines – https://www.ieee.org
Academic & Research Sources
- MIT Computer Science Security Research – https://www.mit.edu
- Carnegie Mellon CyLab Security Studies – https://www.cmu.edu
- Stanford Internet Observatory – https://www.stanford.edu
Consumer Testing & Reviews
- Consumer Reports Home Security Testing 2024 – https://www.consumerreports.org
- Better Business Bureau Security Company Ratings – https://www.bbb.org
- National Association of Home Builders – https://www.nahb.org
- Insurance Institute for Business & Home Safety – https://www.ibhs.org
- Federal Trade Commission Consumer Protection – https://www.ftc.gov
Additional Sources
- 11 Home Burglary Stats Every Homeowner Should Know in 2025
- 2025 Home Security Market Report | SafeHome.org
- Wiretap Laws in the United States
- How Do Burglars Break into Houses?
- 7 potential issues with video surveillance in police investigations | Axis Communications
- 7 in 10 Cameras Are Running Out of Date Firmware | 2019-12-05 | Security Magazine
- Homeowner Insurance Discounts For Monitored Security Systems